Custom Groups
Custom Groups is a great time saver you can use when running Standard Analyses or Custom Queries. This feature allows you to preselect groups of data elements that you frequently use, so that you don't have to make the selections individually every time you run an analysis. For example, you can create a group that includes all of the practitioners that you typically would select when running a Standard Analysis or Custom Query. Once the custom group is created, it is automatically added among the report prompts where you can select the entire group of practitioners instead of selecting each practitioner individually whenever you run an analysis.
Additionally, once created, the custom groups are automatically available to use on all of the related attribute hierarchies. For example, if you create a custom group that includes multiple cardiac surgery diagnosis codes, that custom group will be available to select for either Principal Diagnosis, Secondary Diagnosis, or Diagnosis All report prompts.
There are multiple options available for you to create a custom group, including groups based on: APR DRGs, MS-DRGs, Facilities, Practitioners, Diagnoses, Procedures, Payers, Peers, and many more.
Important Notes:
- The Custom Groups feature only supports the creation and maintenance of ICD-10 based custom groups
- Reminder that QualityAdvisor is not compatible with Internet Explorer compatibility view. If you are using the IE browser (v11 or higher) with compatibility view turned on, you may need to turn off compatibility view or use an alternate browser (e.g., Chrome or Firefox) to be able to access the Custom Groups feature
Custom Group Rules
There are several rules to keep in mind when you are creating custom groups:
- When creating a Peer Provider custom group, you must select a minimum of five providers. See the External Peer Methodology for detailed information
- When uploading or importing files you must use the .txt or .csv format
- Each item in an imported file must be separated by a comma or semi-colon
- Any custom group created using an imported file is limited to a maximum of 1000 selections
- Any custom group created using only manual selections is limited to a maximum of 5000 selections
- You cannot use a combination of imported items + manual selections to exceed the maximum of 1000 selections
- You can use Boolean Operators if needed. Choose from AND, OR, and AND NOT
Creating a Custom Group
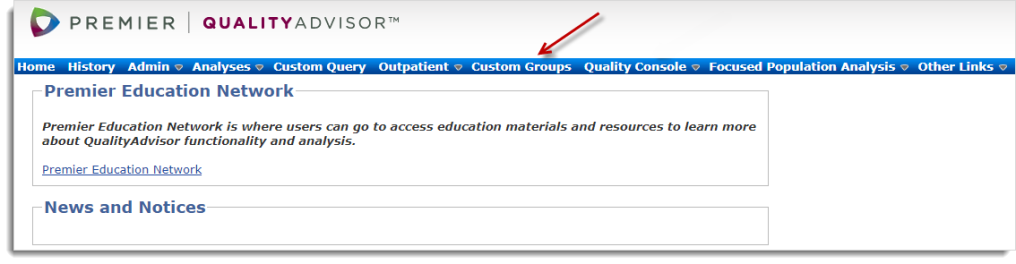
To create a custom group, go to the Custom Groups feature using the link on the QualityAdvisor main menu bar.
On the Custom Groups main page:
1. Expand the CUSTOM GROUP TYPE attribute list and make a selection for the attribute you will use for the custom group. Then click on the Create Custom Group button.
(You must make a selection from the list before the Create Custom Group button becomes active.)

*You must have access to all facilities within a corporation to fully utilize the Entity Level attributes. These attributes are intended to show aggregate performance at various levels within an organization such as region, system, and corporation. |
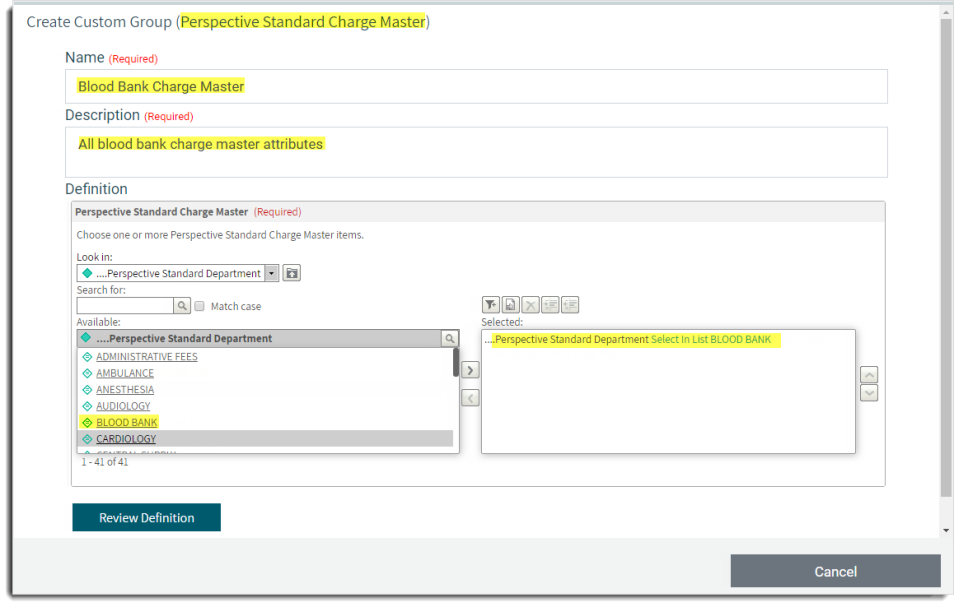
Clicking the Create Custom Group Button opens a blank Create Custom Group form.
2. Enter a name for the group
3. Enter a brief description for the group
4. Select all of the attributes you want to include in the custom group
Below is a sample screen of a Standard Charge Master - Blood Bank custom group:
5. Click on the Review Definition button
6. Review your custom group selections. Note that the custom group you are creating is based on the attribute selected from the main screen. If that attribute exists within a hierarchy, there may be more than one way to navigate to that specific attribute type. When you select a parent-level attribute, the review screen displays all of the child attributes based on the custom group type you selected. In the sample screen below, notice the custom group includes all 309 codes that roll up to the Blood Bank attribute even though these charge master items were selected by only including the Blood Bank department

7. You can now either select the Change Custom Group Definition link to go back and make changes, or click on the Create Custom Group button to complete the process
Delete, Edit, Share, or Duplicate a Custom Group
Under the ACTIONS column on the right side of the Custom Groups main screen you will find the options to Delete, Edit, Share, and Duplicate custom groups.
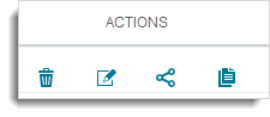
- Use the Delete icon to remove a custom group from your screen, including groups that were shared with you by another user. Note: Deleting a custom group shared with you by another user does not delete the group for the group owner or any other users. However, deleting a group that you created and shared with other users will delete the group for all other users.
- Use the Edit icon to open a custom group to make updates or edits
- Use the Share icon to share your custom groups with other users within your healthcare system
- Use the Duplicate icon to create an exact copy of an existing custom group that you have access to. You can use this option to take ownership of groups that were shared with you by another user, or to use an existing group as the starting point for creating a new custom group
Importing Files
If you create a custom group that will include hundreds of selections (e.g., Practitioners or MS-DRGs etc.), you have the option to import your selections directly to the custom group.
Note: Due to technical constraints, the maximum number of selections allowed for a custom group created using imported files is 1000 items. It is not possible to import the maximum number of items, and then make additional manual selections to the group to exceed the 1000 max. However, for custom groups that do not use imported files, the maximum number of allowable manual selections is 5000 items.
- Imported files must be in .txt or .csv file format, and all items in the file must either be on a single line separated by a semi-colon only (no commas or colons, and with no added spaces), OR each item must be on its own separate line with NO commas, colons, or semi-colons. For example:
123456789;987654321;23456789;
OR
123456789
987654321
234567891
To import a file, select the Import icon on the Create Custom Groups screen and then browse to the location of the saved (.txt or .csv) file on your computer.
![]()
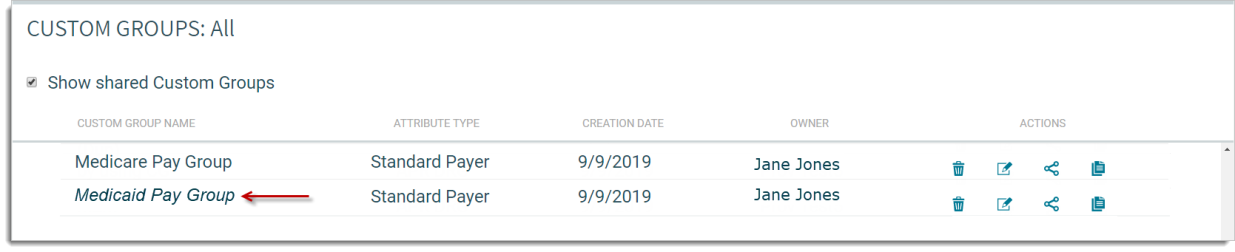
Shared Custom Groups
Any custom group that you have shared with other users or that has been shared with you by another user, is displayed on your Custom Groups main screen in italics.
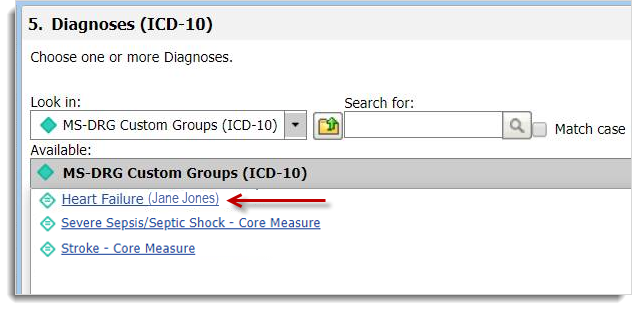
When selecting report prompts, custom groups that have been shared with you by another user display the name of that user in parentheses.