Using Show Items
The Show Items button appears on the Row Header prompt and allow you to filter the resulting rows of an analysis before you run it. Click this button to see the items available for a Row Header selection.
To show items for a Row Header prompt selection:
- Using the arrow buttons on the Row Header prompt, make a prompt selection.
- Click on the selection. The selection is highlighted and the Show Items button becomes available.
- Click the Show Items button. A list of the items associated with the selection displays at the bottom of the prompt.
Note: You may need to scroll to see the entire list.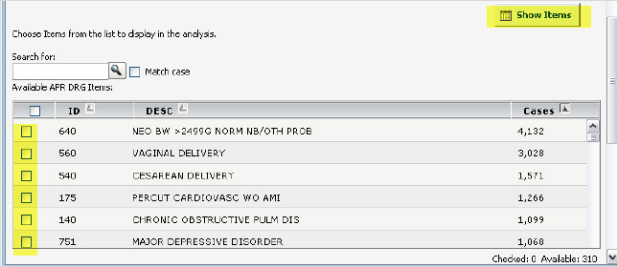
-
Select the items that you want to add to the rows on the analysis.
-
Then, click the Add button located below the item list (you may need to scroll down to see the Add button). Your selections move to the Selected Items box and will become row headings on the analysis.
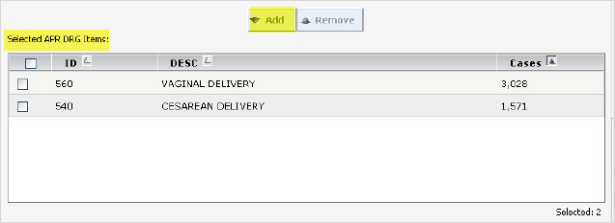
Note: This is optional: If you would like to aggregate the remaining items (the items not moved to the Selected APR DRG Items box in the above example), select All Others as Comparison Group. The data for the remaining items will be aggregated and appear on the analysis with the row heading of Comparison Group.
Show Items for the Reason for Readmission Analysis
Show items functionality works differently for the Reason for Readmission analysis. When you click Show Items on the Reason for Readmission analysis, the results display both the cases for the total population and the readmitted cases:
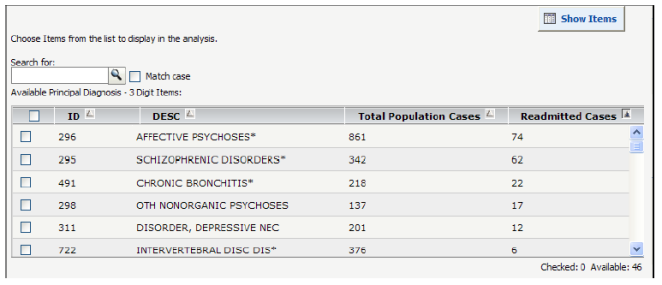
Total Population Cases are the cases for each item that match the prompt selections on the Select Population tab (on all other analyses, this column displays as “Cases”).
Readmitted Cases are the number of Total Population Cases for each item that count as readmissions on this analysis.